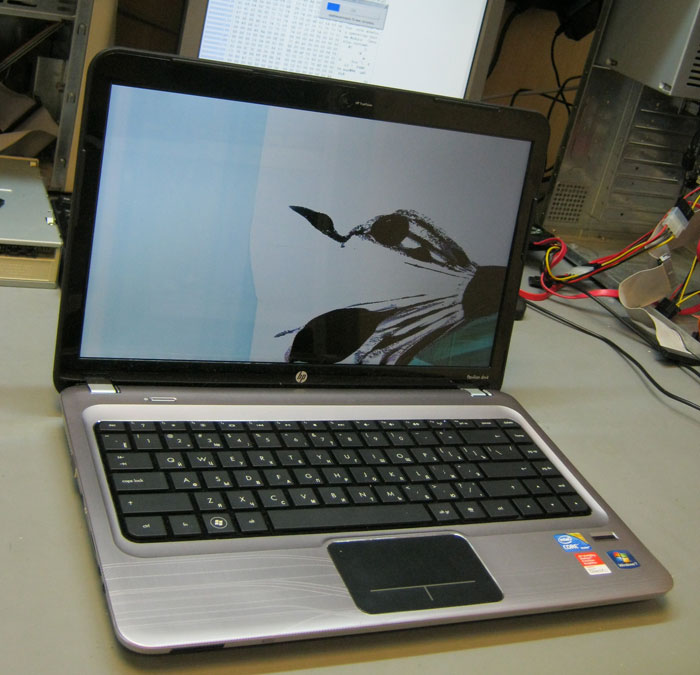
Recently, an acquaintance asked me to fix a laptop.. This time it was not about software - it was with a broken matrix. It was the same HP Pavilion, on the example of which some time ago I described the launch of the eRecovery mode. In such cases, you first need to disassemble the laptop., to know the type of matrix, you want to buy. In the case of HP Pavilion, as it turned out, We fit a lot of different matrices with a diagonal 15,6 inch 40 pin, placed at the bottom of the left hand.
so, before starting repairs laptop I bought a new matrix here with home delivery by courier service. Naturally, I paid for the purchase and delivery, First make sure it is the integrity of the.
Removing the damaged matrix
It looks like a laptop, which got me, you can see in the photo above. Before, how to get started, you must turn off the laptop, be sure to disconnect the power adapter from it and remove the battery. Then you should unscrew all the bolts located around the matrix.
To remove the caps I used a safety pin, thus he placed them in a safe place so as not to lose. Then he took a small (to size) Phillips screwdriver and unscrew the bolts. The frame around the matrix rests not only on bolts, in addition it snaps, therefore, taking the knife I slipped between the cover and the frame and scroll until it clicks, I did the same in a circle until the frame has not been completely removed.
I then unscrewed the screws that hold the back cover at the top and bottom. After complete removal of the last, you need to carefully handle loops, as they can be easily damaged. Before taking off completely, I detach the ribbon matrix as well as web-camera module. At the end there were some screws, which fix the matrix to the loops:
I waited a little difficulty with the labels peeling off from the loop matrix, which is attached to it on tape.
So a fairly simple way possible to remove the matrix from a laptop.
Installation of the new matrix
New matrix looked like:
Connector for sheyfa on it is like in the original matrix:
I started with the installation of bolting to the loops on the sides. Then join the main trail as well as a web camera. Scotch taped so as soon as:
Once screwed back cover I connected the power and turned on the laptop. Making sure that everything is working as it should, I turn it off and began to mount the frame on the latch. At the end left to tie it close cogs and last plugs.
Before replacing the self-matrix recommend you view the video on this article. It provides step-by-step instructions on how to replace the matrix with HP Pavilion


