We offer you a brief guide to the replacement of the LED array in the laptop by interteam.com.ua.

As an example,, for today's instructions notebook model will be used most widely Asus equipped 15.6-inch HD LED array with a 40-pin connector for the matrix loop. As for the disassembly procedures other notebook models, the only difference, с которым вы можете столкнуться – это способ крепления рамы матрицы с размещением монтажных винтов.
Step 1: Make, you really need to be replaced with a new matrix
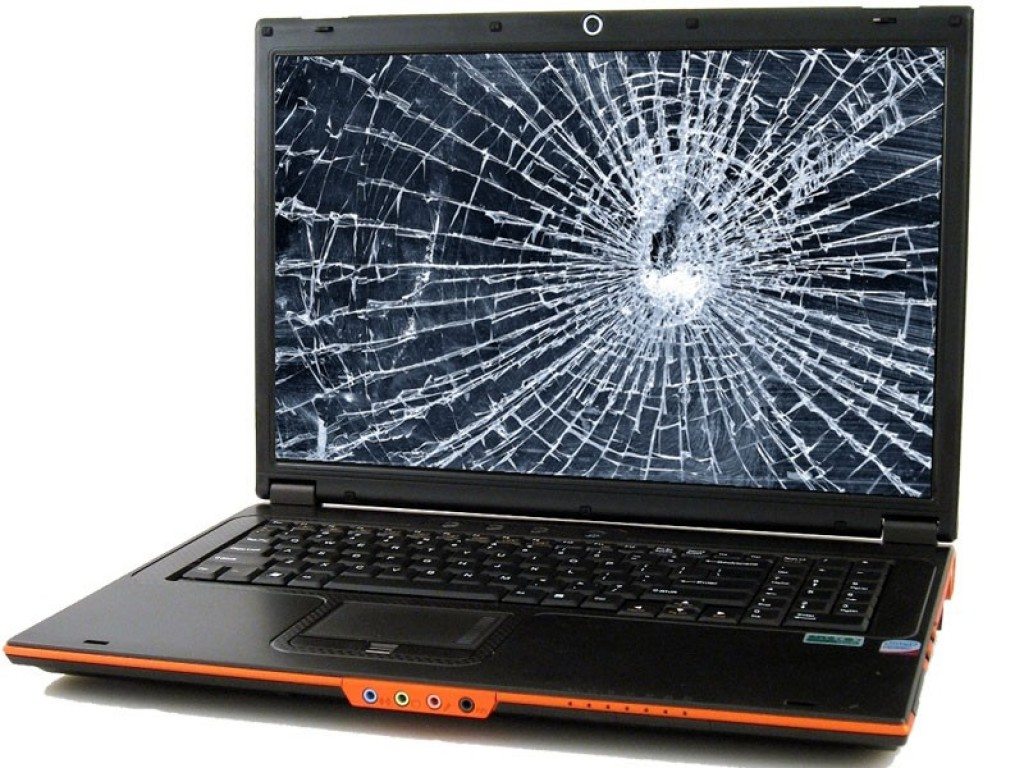
Laptop fell on the floor or on a screen dropped something heavy, явно видно невооруженным глазом механическое повреждение? Диагноз прост – матрица требует замены. Find and buy a new matrix, you can online https://asusparts.com.ua or call (066) 18-33-889.
If the matrix problems are not the result of a fall or mechanical damage, and, However, image not displayed, matrix does not necessarily need to change. The reason for the fault may be damaged flowchart, Matrix trail or simply disconnect it from the socket.
When, if you see a line or a solid color screen, connect the external monitor through the HDMI, VGA or D-Sub. If you notice symptoms identical to an external monitor, motherboard or graphics card, probably, were damaged.
but, if the image is correctly displayed on the external monitor, then the problem is still in the matrix or a loop.
Step 2: Prepare a laptop and tools, necessary to remove the matrix
It is worth to collect some necessary and useful tools for this process. We will need the following:
- crosshead screwdriver;
- triangular plastic clip or plastic card.
Besides, may need:
- Tweezers;
- a razor blade or a very thin pointed object;
- duct tape;
- container to unscrew the mounting screws or small magnet.
Very important! Remember, that the entire process of disassembly and assembly must be carried out without connecting the power supply. You will need to unplug the power cord and disconnect the battery. Failure to do so may cause a short circuit and damage the motherboard or electronics in the matrix.
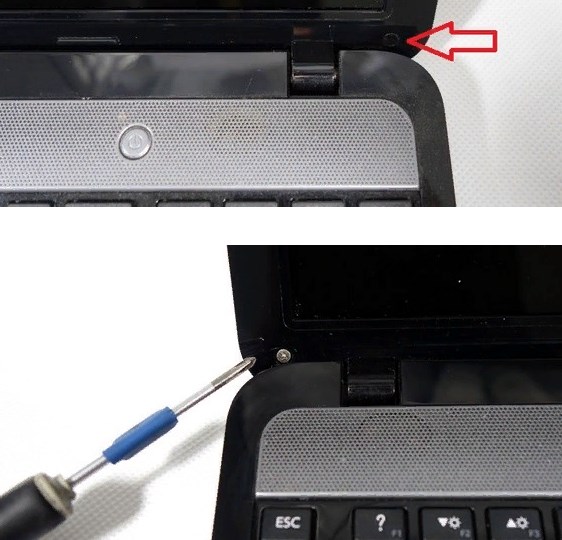
Step 3: Locate and remove the screws holding the frame matrix
Usually, matrichnaya frame, in addition to the plastic latches, also attached by screws. It should carefully examine the entire surface of the frame in search of plastic or rubber plugs, for which it is possible to find the screws. Here you will come to the aid of a razor blade or pointed object, which enables accurate undermine cap screws, which may be slightly glued. Use a Phillips screwdriver to remove the screws and put them in a safe place.

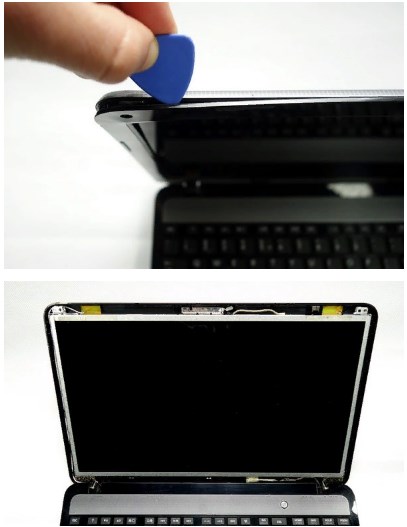
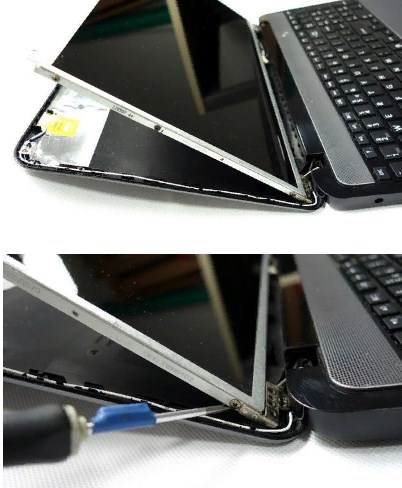
Step 4: Removing the matrix
Now we dismantle the frame matrix. The whole process is to separate the plastic latches, that hold the entire structure together. In this work, the assistant will povezennym triangular plastic clip or plastic card, that no problems will slide between the two elements. You can also use a knife, but the process must be carried out carefully, so as not to scratch or damage the cabinet.

Step 5: Removing the matrix
Depending on the notebook model matrix can be fastened directly to the housing lid via plates fastened to the guide or, that, in turn, screwed into the damper and hinges.
In our example, we are dealing with a standard matrix, attached via the rails to the damper. unscrew the screws, retaining guide loops.


Usually, After removing the screws, retaining rails and hinges, the matrix can be removed and put on top of a laptop (keyboard). In our particular case ADR has loops and fixed guides. After removing the screws the lid is opened and there is access to the screws in guide. Turn off them, кладем винты в безопасное место и кладем матрицу на клавиатуру. Действовать нужно аккуратно чтоб не повредить шлейф.


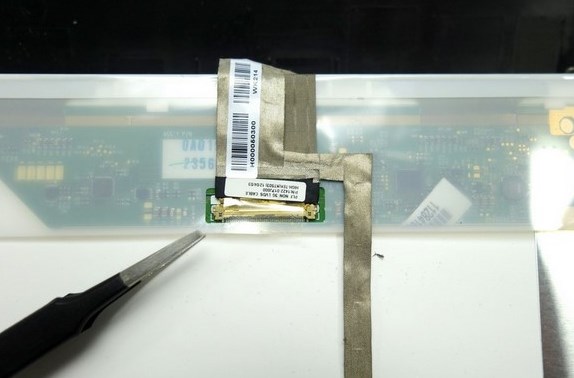
Matrix is now connected to the notebook only through the loop. Sam trail is often glued to the matrix with an additional adhesive tape, to prevent it from disconnecting during operation cover (opening and closing of the notebook). Using tweezers gently detach the tape around the nest and, moving up (according to the attached photos), pull the loop out of the slot.

Step 6: Installation of the new matrix
If you have already ordered the new matrix, similarly the reverse process will no longer be a problem for you. Next steps:
- Check whether the laptop is disconnected from the power supply (battery, Power Supply)!
- Connect the cable and securing it with adhesive tape.
- Screw the matrix to guide.
- Fasten the rails to the loops.
- Screw the cap to the guide.
- Install the cover frame.
- Tighten the screws holding the cover frame and install the plug.
- Connecting the battery or power supply and final check matrix
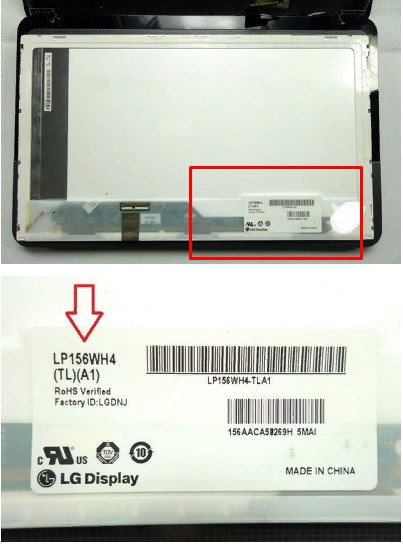
If you do not know, which matrix is needed for your laptop, contact with a counselor online store Аsusparts, they will help you choose the right screen model. To do this, it will be necessary to read the manufacturer's code from the matrix, which is located on the rating plate. Below is a sample code.