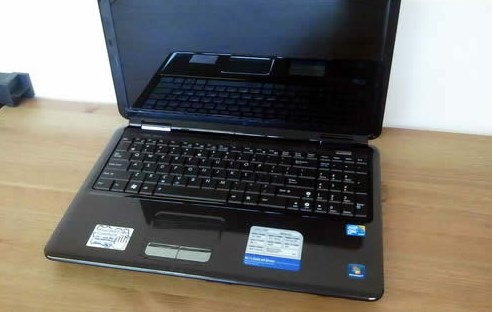
Damage on the keyboard can have two characters: mechanical and electronic. In the first case, the key is not to keep his place, They emit an unpleasant crunch or not pressed. In the second scenario, the depression and adjacent to it when the key button is pressed. In both cases, the damage requires repair, and replacement. In this article, we will step by step in the photo shows how to replace the keyboard in the Asus laptop. Photos and instructions provided company pcservice, that with 2008 He has been professionally engaged in repair of computer equipment in Zaporozhye.
Symptoms of damage to the keyboard
Symptoms of damage to the keyboard are:
- залипание клавиш – часто происходит при попадании воды;
- to the display of other characters, that is, not those that you click;
- the refusal of some keys;
- physical damage.
Why you should not attempt to repair the laptop keyboard?
In the case of the keyboard damage experts do not recommend it to conduct an independent repair, it is better to entrust professionals, in many cases, after trying to repair a button down beyond the entire keyboard due to damage:
- loop;
- connector;
- assemblies and other devices.
keyboard diagnostics should trust experts, who perform diagnostics give a precise answer possible to repair the keyboard, or need to be replaced. If your keyboard is completely out of order can replace it yourself, how to do it correctly, we wrote below.
Compatible notebook models
In our case, the required replacement laptop keyboard asus k40ab, it we actually show below, but step by step guide is relevant for other models that have a similar structure. These include:
- K53, K53u, K53T, K53Z, K53B, K53TA, K53T, K53BR, K53J, K53JC;
- A53, A53U, A53T;
- G53;
- X53, X53U, X53B, X53BR, X53BY, X53E, X53Z, X53TA, X53TK;
- K73, K73T, K73BY, K73TA;
- X73, X73B;
- N50.
note! All notebook models listed above refer to the products by Asus.
Step by step guide keyboard replacement
Before, you begin to remember keyboard replacement, that the notebook is rather fragile equipment. You should treat it with great care, not to apply excessive force. Before, how to get the laptop keyboard replacement, must be disconnected from the power supply it, and then the battery.
- The keypad lock is held by five top mounts.
- To unlock the lock, click on it with a flat screwdriver, at the same time carefully lift the keyboard, to lock remains open. Repeat this step for each of the five fixtures.
- After removing all fasteners, you can lift the keyboard.
- Turn the keyboard over and place it on the computer case, that will provide free access to its port on the motherboard.
- For, to unlock the keyboard connector, slide the brown clip about 2 millimeter. be careful, to pluck it. Then remove the ribbon cable from the socket.
- Repeat steps 1-5 in reverse order, when you install a new keyboard.
