Nowadays, almost everyone has a mobile phone. How many smartphone users, so many problems, Related. But the most common, of course, It is Cracked Screen. The web on smartphones displays not only spoils the appearance of the form, but it can also be unsafe, because using such a gadget can damage your hands or face. This is why it is worth fixing your smartphone, by doing it yourself or in a service center. Today we will show you, how to fix such damage, replacing display in Huawei P Smart. Remember, that actions, presented in this guide, performed at your own risk.
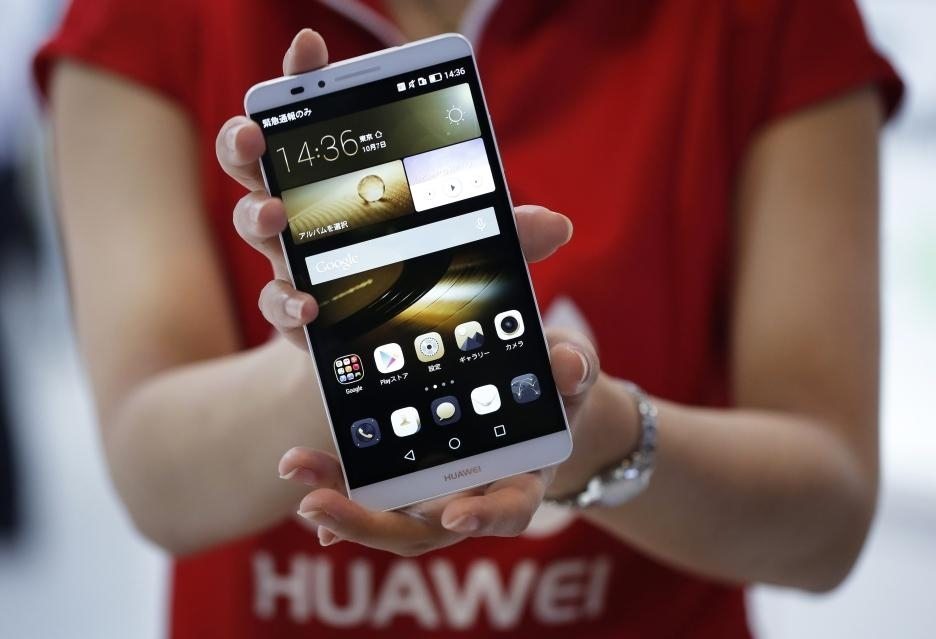 Screen replacement will entail replacement of the entire display module. You are interested, how to carry out such a repair? stay with us, and we will describe step by step the steps of replacing LCDs, we will tell you what you should pay attention to.
Removing the battery cover on the Huawei P Smart
Start by removing the battery cover. But, before, how to start dismantling the cover, you need to pull out the SIM card and memory card slot, because it is inserted into the board and may damage internal components when removing the cover, including the motherboard. To do this, use the "key" that comes with the smartphone. If you don't have it, then you can use a paper clip or a pin instead.
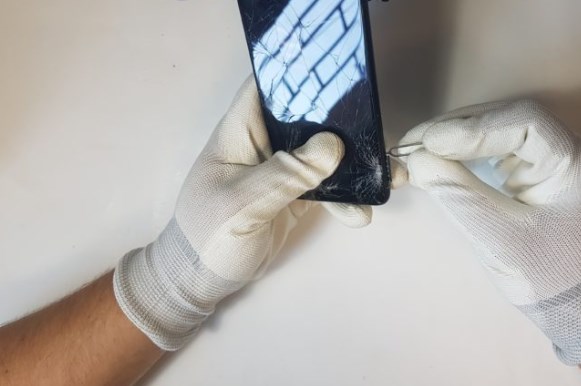
As soon as we pull out the slot, it's time to start repairing, for the next step you will need a plastic guitar pick, using it, we separate the battery cover from the entire display case with the motherboard and other components.
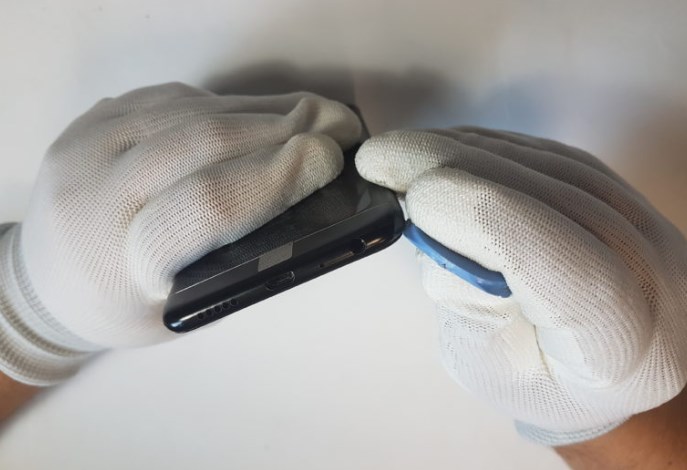
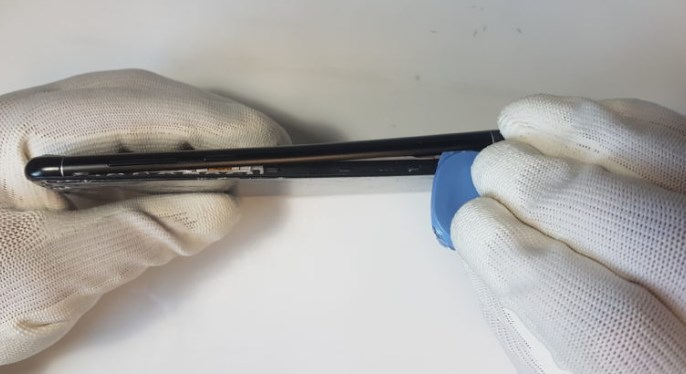
When detaching the battery cover, gradually move the pick or plastic knife, this will allow you to get to the cable connecting the fingerprint reader to the motherboard. We work with the tool until the battery compartment cover is completely separated from the entire body.
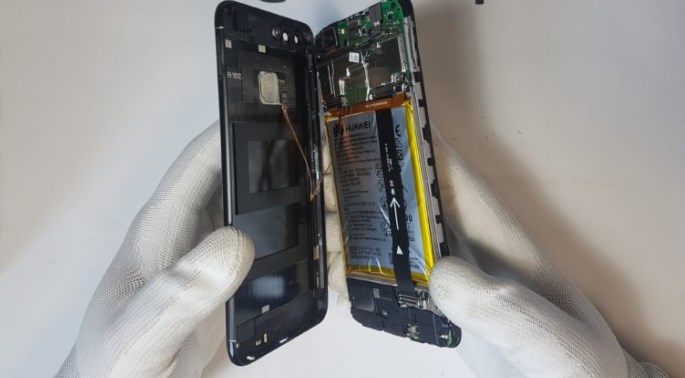
Next, you need to slowly separate the lid, put the Huawei P smartphone face down on the table, by placing an aluminum element next to it, and unscrew 3 screw, that hold the screen. For this operation we use a Philips Phillips screwdriver.
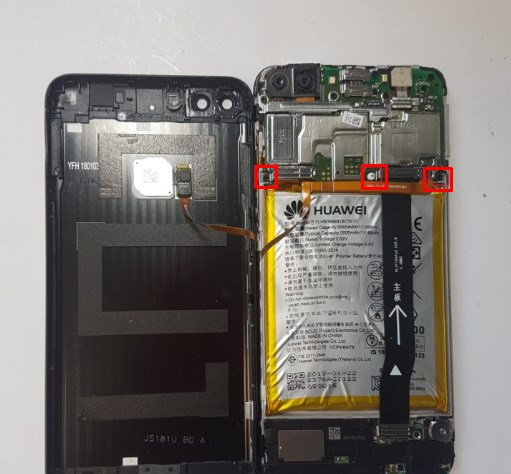
By unscrewing all the screws and setting them aside, it's time to use tweezers, with which you need to carefully remove the protective plates of the cables connected to the main board. We remove and disconnect plates and cables slowly, leisurely. After disconnecting the fingerprint reader ( using the Spudger tool – smartphone repair shovel) the battery cover can be removed.
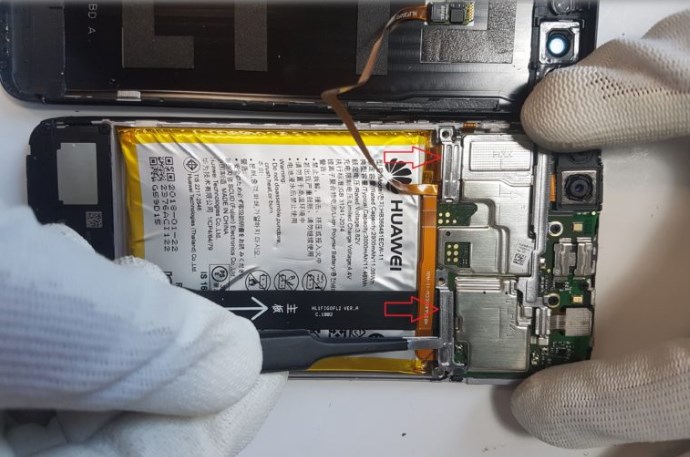
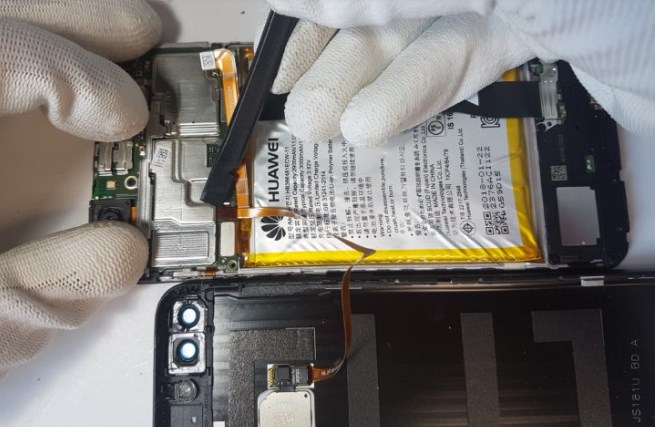
After disconnecting all the connectors, it's time to go to the battery.
Removing the battery and display in Huawei P Smart
This is the hardest moment. The whole module needs to be heated, then remove the battery first, and then the damaged display. It is best to use a liquid crystal separator for this job., which distributes heat throughout the display / the whole body. In the case of a heat gun (hairdryer) you need to heat up pointwise, eg, camera lens. It does not mean, that your house should have such a separator, just when working with a gun, the disassembly time will increase significantly.
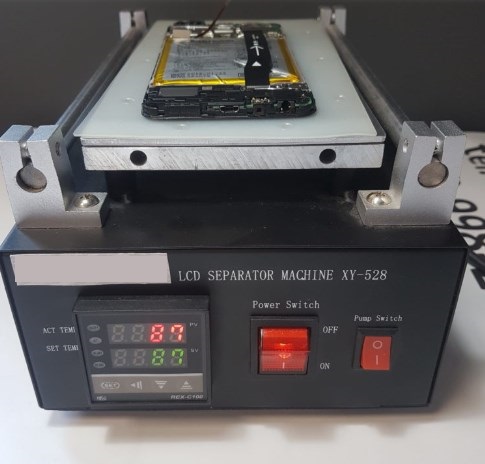
We leave the module on the separator for 2-3 minutes at a temperature of about 85 degrees Distributed evenly heat causes, that the glue "weakens" and begins to release, which makes it easier to dismantle some of the elements. The heating of the battery can be "improved" from above with a hair dryer (additionally blow through with warm air). Затем снимаем аккумулятор.Если он хорошо нагревается, это можно сделать без особых проблем.Если нет, используем spudger или тонкий пластиковый нож, постепенно подрывая батарею.
Remember! No need to use metal tools Damage to the battery can be more than just dangerous, but also irreversible.
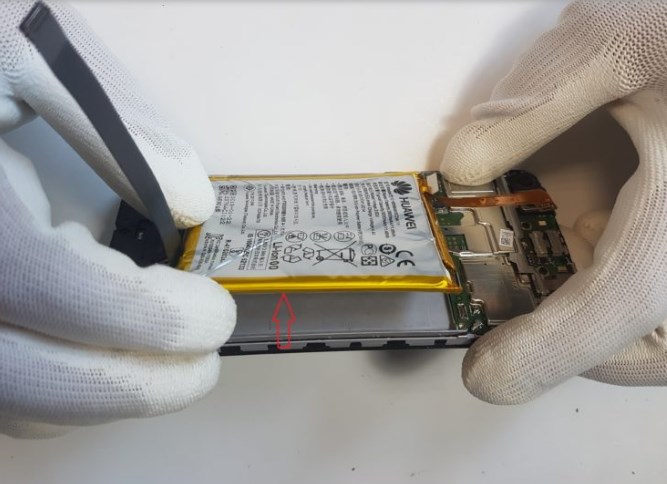
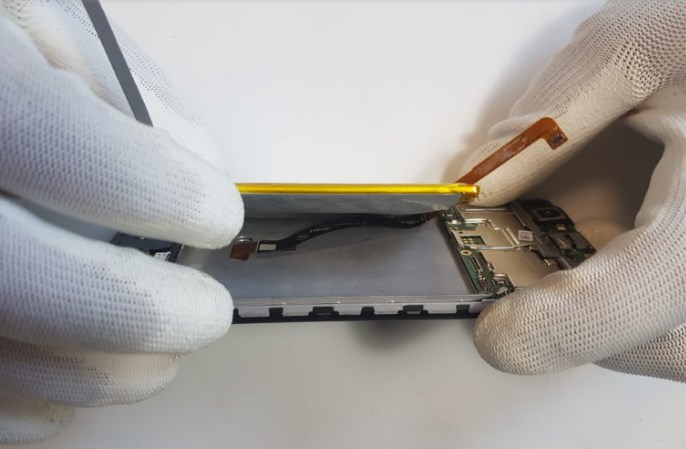
This operation may seem to be the most difficult during the entire display replacement process, so let's not rush to disassemble., let's do it slowly and carefully. If the battery has been lifted and “became” on the halfway, try using a heat gun or hair dryer, passing warm air under the battery.

The removed battery is set aside, and the entire display module is warmed up again on the LCD separator. This time you need to separate the damaged screen. In this case, warm up the display for 2-3 minutes (temperature about 85 degrees). Remember to wear glasses before taking off, this will protect your eyes from possible splashes of glass. If the screen is rigid enough, you can blow it up with a thin opener, eg, old credit card.
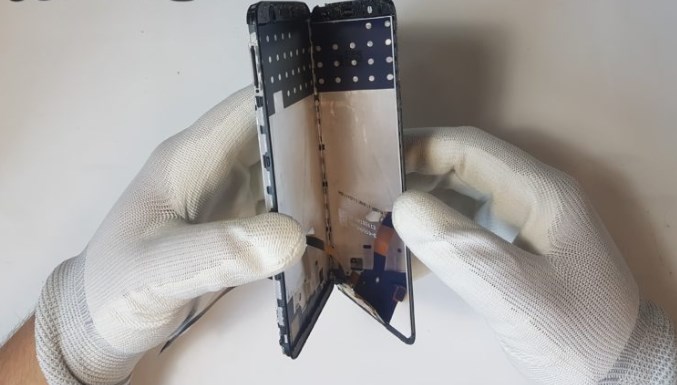
Do not worry, if it cracks during disassembly of the LCD module, because there is no point in putting it in its place :).Pulling out the entire display, не забудьте вытащить шлейф из корпуса устройства, а со сломанного ЖК-дисплея мембрану динамика, которую нужно установить на новый экран. Динамики можно вытащить пинцетом или используя spuders.
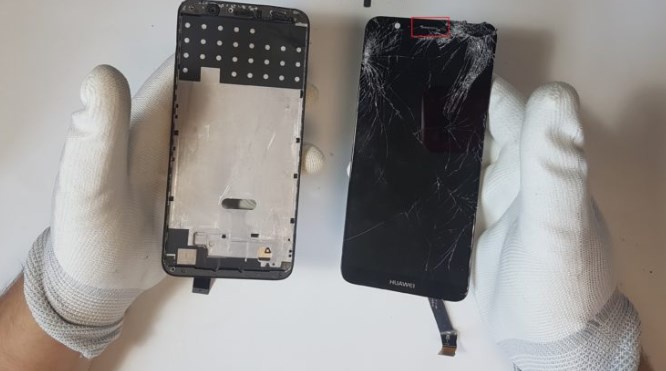
На новом экране достаточно установить мембрану точно так же. Это довольно важный элемент.
Перед установкой нового дисплея мы должны удалить остатки старого клея. Of course, это не всегда будет необходимо, потому что бывает, что клей остается на раме старого экрана. После этого наносим новый клей E8000 на раму смартфона.
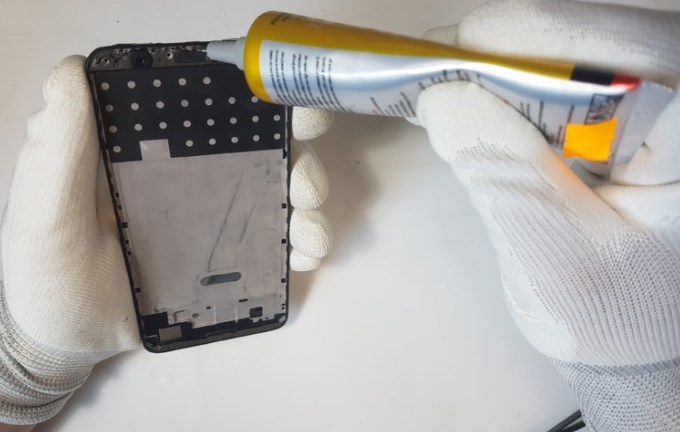
After that, как все вышеупомянутые шаги были выполнены, пришло время установить новый дисплей на Huawei P Smart. First of all, нужно провести ленту модуля через отверстие в корпусе. Потом постепенно настроить / подогнать дисплей ко всему корпусу. Делаем все медленно и точно.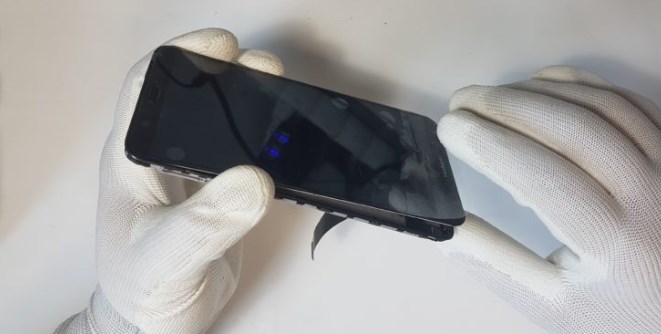 После установки дисплея установите аккумулятор. Remember, что ЖК-шлейф должен находиться непосредственно под аккумулятором, а не над ним.Вставьте аккумулятор в корпус, на котором все еще есть клей, слегка нажмите и проверьте, не выпадает ли он.Если все было собрано правильно, пришло время собрать остальные элементы, в частности установить все шлейфы.
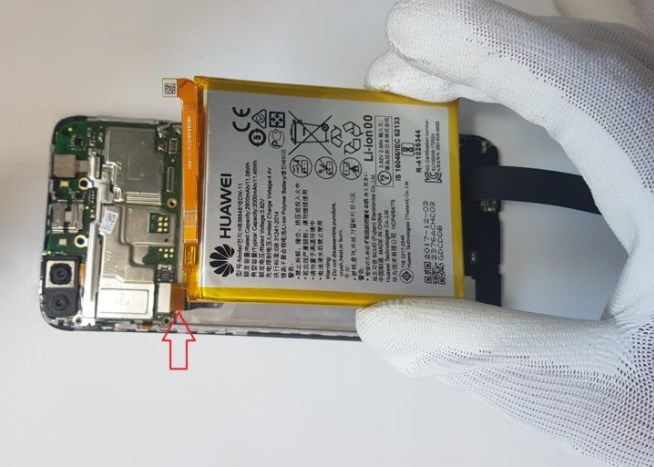
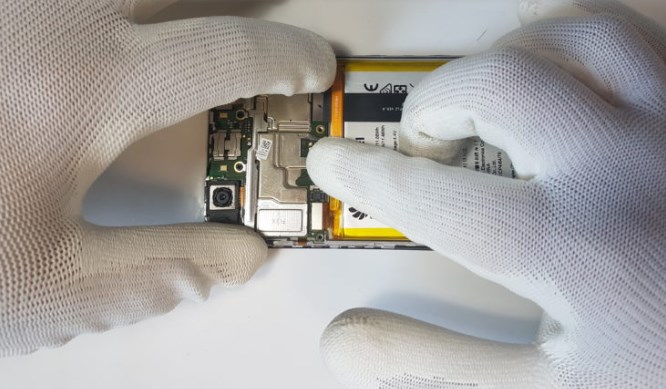
На этом этапе все крепления / шлейфы должны быть прочно соединены.Благодаря этому, сложив все устройство, вы избежите неприятных сюрпризов или проблем с включением телефона.Следующим шагом является установка и привинчивание пластин, защищающих разъемы шлейфов. Порядок завинчивания не является обязательным, однако предлагаем начать с правого.
Следующим шагом будет подключение разъема крышки батарейного отсека и установка защитной пластины для всего разъема.Пластина укреплена винтом, затягивающим ее непосредственно в основной плате.Это будет конец всего ремонта, потому что у нас все еще будет крышка батарейного отсека, установка которой завершит инструкцию замены дисплея на Huawei P Smart своими руками.
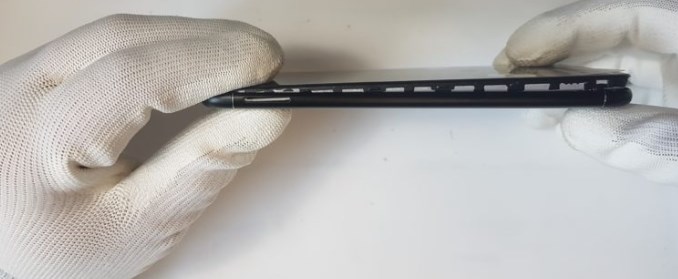
Крышка должна быть вставлена во все тело, начиная с верхней части (speaker, селфи камера). Делать это нужно медленно, постепенно вы будете слышать характерный «щелчок».Эта стадия ремонта не должна вызывать больших проблем. Special, когда вы знаете, с какой стороны соединить весь корпус с крышкой аккумулятора.
Now you know, как заменить дисплей на Huawei P Smart.


